“As soon as I bought my home here, I immersed myself in every gardening book I could lay my hands on. It’s a very calming process that allows me to forget
everything around me.”
“Right now, I’m growing all kinds of beans and peas, carrots and potatoes. I also created a flower bed to add some color and attract hummingbirds. I love it when everything looks rambling and coincidental.”
“As soon as I open the front door to the house, my style goes out the window! It’s nice to not think about what I’m wearing since I do so much of that during the week. Most days I wear pretty much the same thing: a white T-shirt and dirty chinos with an old fleece jacket when it gets cold.”
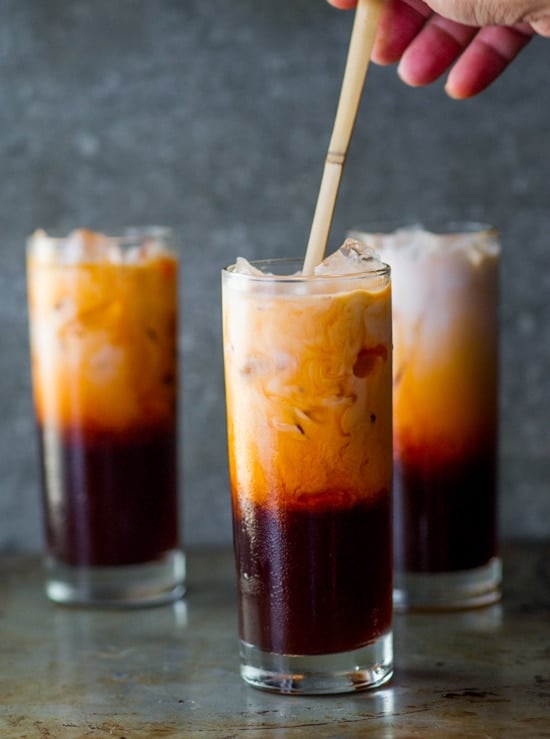
I had a “doh”/”ah-ha” moment last week when we were in Chicago to speak at BlogHer Viewfinder Day. During one of the conference days, we escaped out to lunch at a local Thai restaurant to explore more of the city’s culinary offerings. As always, we’ll try to order something new and different, and in the case of a Thai restaurant it normally involves a curry dish (only medium spicy, please! we’re not as young as we used to be), one noodle dish and an appetizer. On top of that, we always have to have Thai iced tea. How can we NOT have Thai iced tea when we eat Thai food? It’s one of those decant “dessert” drinks that helps soothe the burn when we overload on too much of Thai spice.
Years ago, my Auntie Chung was telling me how easy it was to make Thai iced tea. She had worked in an Asian restaurant and one of the most popular items on the entire menu was Thai iced tea. She proceeded to tell me exactly how to make it and how profitable it was for restaurants to make Thai iced tea.
I didn’t care too much about the profitability of Thai iced tea, but rather, more interested on how easily it was made and why we didn’t make it more often.
Fast forward about 7 years later as I’m sitting in Chicago eating Thai food and sipping my Thai iced tea, my brain light bulb pops on — “We need to make Thai tea! Auntie told me how easy it was to make and why haven’t we made it before?”
Here you have it!
This Thai iced tea recipe is so easy that pretty much every YouTube video you see uses the same brand and shows the same steps. As far as the creamy layer goes, many people use different ingredients such as half and half, whole milk, coconut milk, sweetened condensed milk and even low-fat milk. Choose your creamy poison.
The only difference in our recipe is that we’re using a little less sugar. But really, once you get the basics down on making Thai iced tea you can customize the flavors and concentration the way you like. It’s one of those recipes that is great no matter how you make it because it’s just so decadent and satisfying.
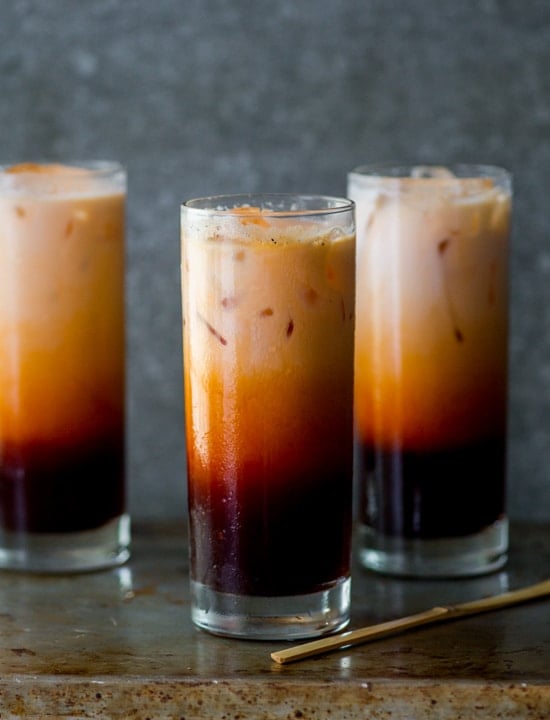
One of the key factors in making it like the restaurants is using authentic Thai tea mixes. These Thai tea mixes are normally dyed with yellow food coloring (look on the package) and that’s what gives it it’s bright orange color. Also, Thai tea has a vanilla aroma to it. So if you want to have the brilliant orange color and flavors like most of the Thai restaurants, then this is one of the brands of thai tea to buy : Panthai.
There’s probably other brands of Thai tea mixes to buy, but this is the one we first tried it with and it was a success.
If you don’t have Thai tea mix, then you can certainly use black tea. We also tested another version with pekong black tea bags and the flavor was still great. Only thing missing was the brilliant orange color and the subtle hint of sweet vanilla.
Either way, find your way into the kitchen or store to buy the Thai tea mix and make yourself a big batch asap. We’re not joking. Make this now and let us know what you think. And remember, make it your own and play with the different levels of sweetness and creaminess.
Thanks Auntie Chung for the homemade Thai iced tea inspiration.
-diane
Fill the glass to about 3/4 of Thai tea mix
add half & half, it makes it creamy good. give a stir.
Bread and bananas are two items that seem to fall by the wayside, at my house at least. A two day old half baguette or a few slices of white and a spotty banana or two are exactly what makes this recipe for Salted Caramel Banana Bread Puddings the ideal last minute dessert, that is, if you have the same overages of bread and bananas.
1 1/4 cups caramel sauce, store-bought or homemade
8 thin slices slightly stale or very lightly toasted firm white sandwich bread (such as Pepperidge Farm or Oroweat/Arnold’s Country Buttermilk or Country Potato Bread)
2 ripe bananas
For the custard:
6 large eggs
2 tablespoons sugar
1/8 teaspoon salt
1 teaspoon pure vanilla extract
2 cups half-and-half
1/2 cup whole milk
2 tablespoons (1 ounce) unsalted butter, melted
Procedures
1
Stir the salt into the caramel sauce. Butter the ramekins and spoon a generous tablespoon of the caramel into the bottom of each one. Spread a tablespoon of the remaining sauce on one side of each bread slice.
2
Cut the bananas on a slight angle into 1/4-inch-thick slices. Cut 1 slice of bread lengthwise in half and then crosswise into thirds, to make 6 pieces. Place a slice of banana on each piece of bread. Stack 4 pieces of the banana-topped bread, turn the stack on its side, and place it in a ramekin. Put the 2 remaining pieces of bread, banana side inward, on either side of the stack. Repeat to fill the remaining ramekins.
3
To make the custard: Whisk the eggs, 1 tablespoon of the sugar, the salt, and vanilla in a medium bowl just until blended but not foamy. Whisk in the half-and-half and milk. Fill each ramekin with the egg mixture, reserving any left over. Let stand until the bread is saturated, 20 to 30 minutes, topping off the puddings with the remaining egg mixture as necessary.
4
Position a rack in the lower third of the oven and preheat the oven to 400°F. Put a kettle of water on to boil. Brush or drizzle the exposed edges of the bread with the melted butter, then sprinkle the buttered edges with the remaining tablespoon of sugar, using a generous teaspoon per pudding.
5
Wipe any smudges off the ramekins and set them in the baking pan. Put the pan in the oven. Pull out the oven rack and pour boiling water into the pan to come halfway up the sides of the ramekins. Bake for 20 to 30 minutes, until the edges of the bread are golden brown and a knife inserted in the puddings comes out mostly clean. Let cool for 10 minutes in the water bath, then remove with tongs. If not serving within 2 hours, cover and refrigerate.
6
Serve the puddings in their cups, warm, at room temperature, or cold, or reheated individually for a few seconds in the microwave. Or unmold them: slide a thin knife around the inside of each ramekin to detach the pudding, tip the ramekin on a dessert dish, and slide the pudding out, letting the sauce flow around it. Scrape the extra sauce from the cup around it or drizzle on top.
If you follow me on Pinterest you may have noticed by now that I love macarons, I’m pinning them all the time. They are so delicate, I love their versatility of flavors and their bright colors and honestly how could I resist them, they taste like candy. Every time we go on vacation I’m sure to grab some – because they only sell them within probably 2 hours of me. In California I loved the salted caramel and the coconut macarons from Lette Macarons in Newport Beach, and during our recent short term move to Washington D.C. I loved getting the red velvet macarons from The Sweet Lobby.
With the recipe below I only listed the ingredients you’ll need then inserted a link to Bravetart for the directions. I love Stella’s recipe and it was also fun reading through her macaron myths. Macarons are tricky, and I’m no pro (I’ve only made them a number of times) so I’d thought it would be better just to link to her directions because she knows what she’s doing.
This recipe is very versatile. I also considered filling these with a chocolate ganache. They are very sweet with the jam, so if you don’t have much of a sweet tooth you might want to go with a little jam along with some dark or bittersweet ganache and maybe use a less sugar jam. Enjoy!
For macaron directions please visit the recipe here on Bravetart as that is the recipe I used, adding the 3/4 tsp coconut extract in place of the vanilla and tinting if desired with food coloring.
Allow macarons to cool completely. Spread about 1/2 Tbsp raspberry jam between 2 macarons. Store in an airtight container.
Recipe Source: adapted from Bravetart
These are the macarons from Lette (taken March 13′). I loved their vibrant colors.
These simple yet unforgettable Baked Vanilla Bean Doughnuts will make vanilla your new favorite flavor.
If you had to pick one dessert to describe your personality, what would it be? Maybe you’re traditional like chocolate chip cookies or a little bit sassy like a fruit tart. Maybe you’re intense like Chocolate Chili Cookies. Or maybe you’re simple like these Baked Vanilla Bean Doughnuts. Today I’m teaming up with Baker’s Joy to help launch their “Which Sweet Treat Are You?” quiz that pairs your baking personality with one of nine delicious desserts. My challenge was to create a simple yet not boring recipe focusing on vanilla. Trust me when I say this – these doughnuts will change your mind about liking vanilla.
If you’ve been reading my blog for awhile, you probably know I’m not exactly simple when developing recipes, so this was a fun challenge for me. What can I make with vanilla that is simple yet unforgettable? After all, simple does not equal boring. I chose to make doughnuts (or is it donuts?) in my baking pan since they take little effort to make. Make the batter, pipe into pan, bake 10 minutes, done. If you wake up early enough, I bet you could have these ready in time for breakfast.
Vanilla is one of those ingredients where you need to buy high-quality vanilla. Look for the bottle that says pure vanilla extract and not imitation vanilla extract. I promise it’s worth those extra couple of bucks. Next you’ll need to buy vanilla beans. Don’t bother buying any from the store because they are expensive; it’s much cheaper to buy online. Mine are from Marx Food but you can also find them on King Arthur Flour and even eBay.
If you say you don’t like vanilla, chances are you never had vanilla bean before. Ice cream is the perfect example. There’s boring vanilla ice cream from an ice cream stand, then there’s homemade vanilla bean ice cream. These tender baked doughnuts are speckled with vanilla bean, which kicks up the vanilla flavor a notch. Maybe I should’ve called them Triple Vanilla Doughnuts because you have vanilla bean and extract in the batter then a vanilla glaze on top.
Make sure you take the “Which Sweet Treat Are You?” quiz then come back here and leave a comment telling me what your dessert personality is! From April 22 – May 5, you can take the quiz as many times as you want for a chance to win a daily prize which includes $50 Visa gift cards and a year’s supply of Baker’s Joy and be entered to win the grand prize of $500 Visa gift card, KitchenAid mixer, and a year’s supply of Baker’s Joy.
1 vanilla bean, split in half down the middle longways and seeds scraped into a bowl (discard the pod)
1 egg
1 teaspoon vanilla extract
1/2 cup milk
Glaze
1 cup powdered sugar
Pinch of salt
3-4 teaspoons milk
1/4 teaspoon vanilla extract
Instructions
Preheat the oven to 375F. Lightly spray two baked doughnut pans.*
In a medium bowl, whisk together the flour, baking powder, baking soda, and salt.
In a large mixing bowl, beat together the butter and sugar until creamy, about 2-3 minutes. Beat in the vanilla bean seeds, egg, and vanilla extract until incorporated then add the milk. Gradually beat in the flour mixture until just incorporated.
Spoon the batter into a pastry bag** then pipe into each doughnut cavity, being careful not to fill it too full. Bake 8-10 minutes or until a toothpick comes out clean. Cool 5 minutes then remove from the pan and finish cooling on a cooling rack.
For the glaze
In a medium bowl, whisk together the powdered sugar, salt, 3 teaspoons milk, and vanilla until smooth. If it's too thick for a glaze, add the extra teaspoon of milk.
Once the doughnuts are completely cool, dip the tops of each doughnut into the glaze and let the excess drip off. Let the glaze harden before serving. Store in an airtight container.
Notes
*If you only have one doughnut pan, bake the first six doughnuts. Once you remove them from the pan, cool in the fridge for 5 minutes then finish baking the remaining doughnuts.
**It's easiest to pipe the batter into the pan using a pastry bag fitted with a large round tip (either a real pastry bag or a sandwich bag with the corner cut off), but you can also carefully spoon in the batter.