Showing posts with label Ice Cream. Show all posts

Sunday, April 27, 2014

Mixed Berry Caramel Sundae!

Mmmmmmmmm!  Decadent!


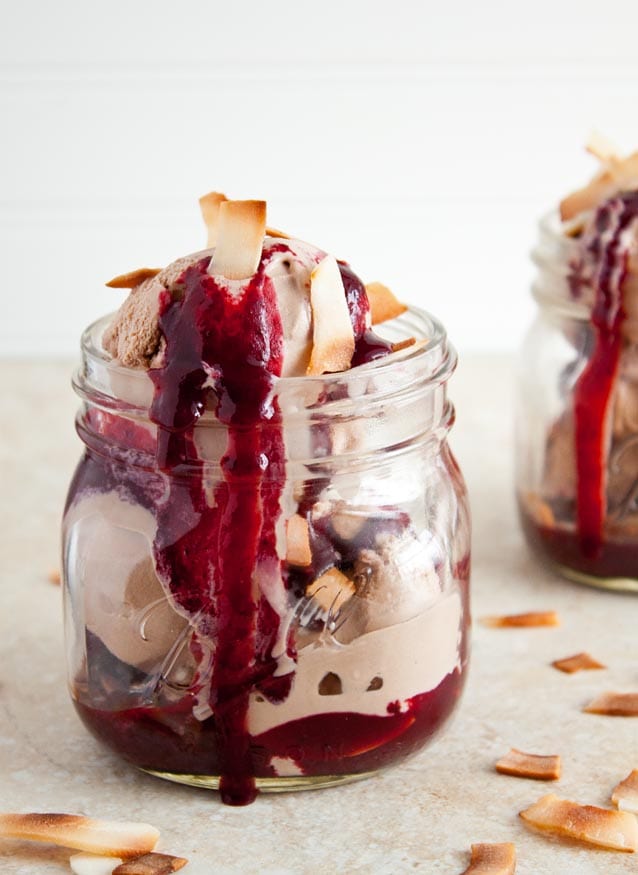
Sundae Jars: Chocolate-Coconut + Mixed Berry Caramel
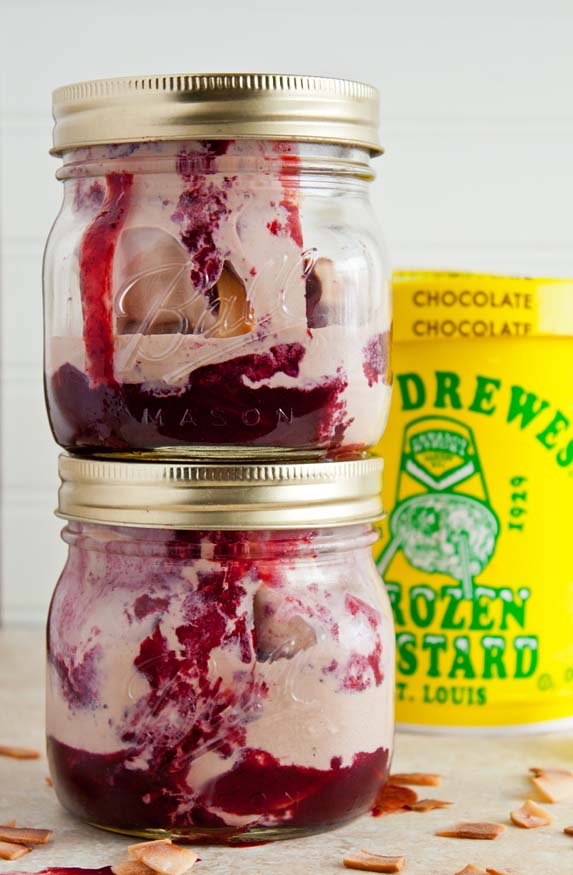
Ice-Cream-Sundae-Jars-1
At this point, y’all are like ‘oh my lands, another mason jar dessert?!’  I know, I know.
But but but, mason jars make it so easy to portion for two!  Unless… you want to purchase stock in Sur La Table and buy many little pans to make my desserts.  No? Just me?  And my Mom?  Ok, got it.  I had a hunch.
I make these ice cream sundae jars and stash them in the freezer for a quick snack.
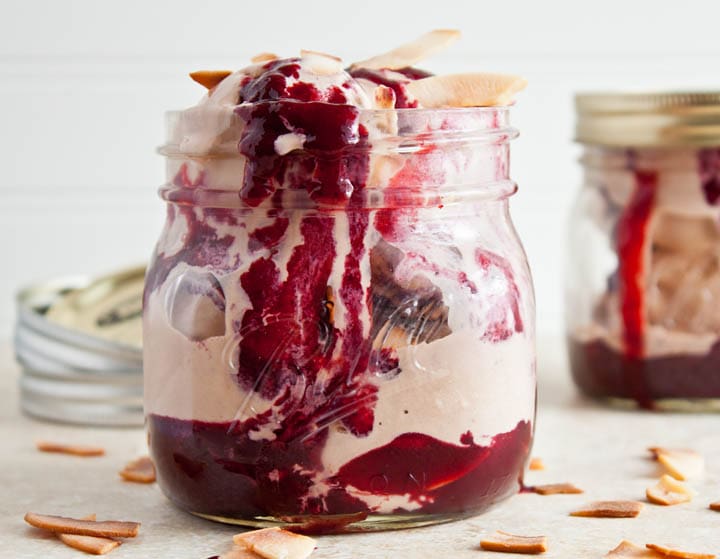
Ice-Cream-Sundae-Jars-2
It can be a bit tedious to make an ice cream sundae each time you have a craving.  First, you have to scoop rock-hard ice cream.  If you wait for the ice cream to soften first, there’s a slight chance you’ll die of ice cream-nemia.  Then, you must drizzle the sauce in between scoops.  Don’t forget about the crunchy nuts that must be layered in a perfect ratio that is unique to each human, much like a fingerprint. <— scientific fact
So, I make these mason jar sundaes sealed with a lid, and store them in my freezer for dessert.  Or, you can take two bites every hour all day long.  I’ve never nibbled on ice cream all day.  Never ever.  Especially not ice cream with toasted coconut chips this size:
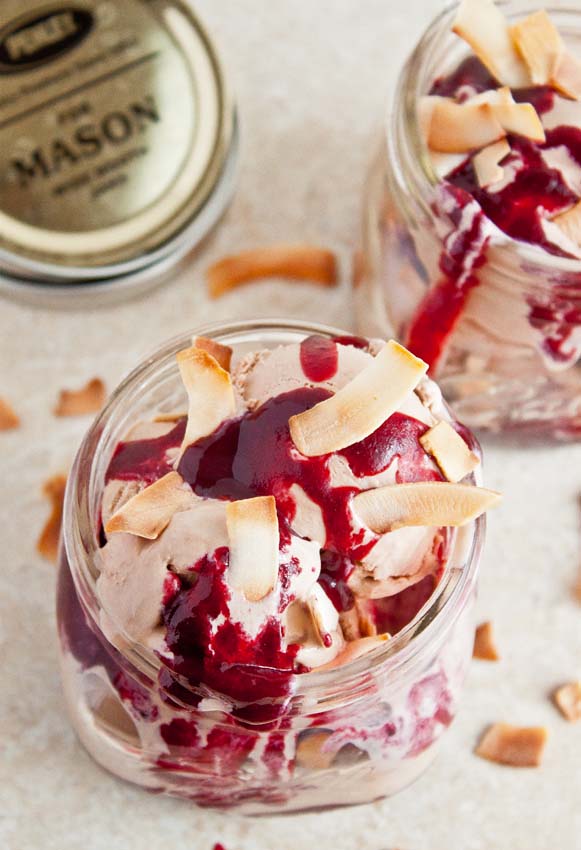
Ice-Cream-Sundae-Jars-3
Speaking of these large coconut chips, I made Mr. Dessert for Two drive me to a store on the other side of the city just to buy them.  So, if you could, please tell me how adorable they are and how this dessert would be incomplete without them?  Help me justify my food purchases to my husband, please.  He doesn’t get it.  You do.  I know you do.
Ice-Cream-Sundae-Jars-4
Hey, St. Louisans:  You were SO RIGHT about Ted Drewes.  So so SO right.  It’s like ‘what was I eating before?  Ice cream?  Aww, how cute, it’s trying to taste like Ted Drewes frozen custard.’  Just like that.  Sorry for all the quotes.

Ice Cream Sundae Jars: Chocolate-Coconut + Mixed Berry Caramel
 
Prep time
Cook time
Total time
 
serves 2
: 
Serves: 2
Ingredients
  • 1 10-ounce bag frozen mixed berries
  • 3 tablespoons powdered sugar
  • 1 tablespoon fresh lemon juice
  • 2 tablespoons heavy cream (or, use butter for a thinner sauce)
  • 1 pint store-bought chocolate ice cream
  • ¼ cup sweet coconut shreds, toasted
Instructions
  1. In a saucepan, combine the frozen mixed berries, sugar and lemon juice. Bring to a simmer and cook until the berries collapse, about 4 minutes. Turn off the heat and stir in heavy cream
  2. Next, puree the berries either with an immersion blender or in a regular blender. Be careful, the liquid is hot. Once pureed, strain the mixture if desired.
  3. To assemble: place 1 scoop of chocolate ice cream in the bottom of a pint mason jar. Drizzle over the berry caramel sauce, and top with toasted coconut. Repeat until the jars are full.
  4. Screw on the lid and store in the freezer up to 2 weeks. Let the jar sit on the counter for a few minutes before eating to soften the berry caramel sauce.

 
Really?  They just keep getting better!  This is from Hymns and Verses!

Peach Crisp in a Mason Jar

Monday, September 2, 2013


It's peach season here in the northeast!  On a recent trip to the local farm market even the air smelled like peaches!   I love fresh peaches and my favorite dessert to make in peach season is peach crisp.   There's nothing like warm peach crisp topped with vanilla ice cream - yum!  


I know you've all seen the different desserts that have been made in mason jars all over Pinterest.   I decided it was time that I give this baking trend a try.  So here's my recipe for peach crisp baked in individual mason jars.

Peach Crisp

8 wide mouth pint size Ball jars

10 fresh peaches

Crisp Topping

1 1/2 cup flour
1 cup brown sugar
1 cup sugar
1 cup oatmeal
2/3 cup butter

Ground Cinnamon


I used the Ball Elite Platinum wide mouth jars.  I found them at Kmart.  They come in a set of four for about $5.50.  I mostly like these because they have the wide mouth and are perfect for an individual serving.


Peal the peaches and cut into bite sized pieces.  Divide the peaches equally among the 8 pint sized jars.  


Next you want to make the crunch topping.  You can mix all of the  topping ingredients using your food processor or by hand using a fork to work the butter through the dry ingredients.  


Again, divide the topping equally among the 8 jars.   The topping will go almost to the very top of the jar.  Sprinkle with a little ground cinnamon.  Put your filled jars on a rimmed cookie sheet and bake at 350 degrees for 30 to 40 minutes (until the topping starts to brown).  


As the peaches bake, the volume decreases and that leaves room on top for your vanilla ice cream!    These individual peach crisps were sooo good - especially served warm with the ice cream!  

I have to say, I think this baking trend is here to stay - the jars are both cute and practical because they are reusable.   And, they are a  perfect individual portion size!  I hope you will give it a try!

Chocolate Chip Cookie & Ice Cream Cake

This looked amazing so I cut and pasted it from Mangoes and Palm Trees!

Chocolate Chip Cookie & Ice Cream Cake (Happy Birthday, Jacquelyn!)

While everyone was busy getting ready for their Memorial Day barbeques and graduation parties, I was busy also figuring out what kind of birthday cake to make. Jacquelyn celebrated her 3rd birthday on the 24th! This little lady has already appeared a few times on the blog...getting ice cream-wasted at Disneyland, proving her status as a farmers market veteran, and even serving as the inspiration for my Strawberry-Kiwi Shortcakes...I thought that it was only right that she had something special to dig into for her big day!

Last year, her Lemon-Raspberry Cake was inspired by the beautiful, pink hydrangeas starting to bloom in the garden. (SO HANDY, those Buster Posey cups are...) I was definitely motivated to top last year's creation, so there were two things taken into consideration: Jacquelyn's love for ice cream and Jacquelyn's love for chocolate. My sister was the one who suggested that I make an ice cream cake. The only thing was...I'd never made an ice cream cake before. But I'm never one to shy away from a challenge or experiment!


Instead of a traditional cake layer, I decided to go with a chocolate chip cookie base. It just made the whole dessert that much more playful and appealing to the kiddos. (Also, think chocolate chip cookie dough ice cream.)

Start by whisking together the melted butter and dark brown sugar.

After adding the egg, whisk until the mixture is thick, pale, and fluffy. Then, add the vanilla.


Whisk the flour, baking powder, baking soda, and salt together in a separate bowl, then fold these dry ingredients into the sugar and egg mixture. Finally, fold in the chocolate chips.

I recommend using mini-chips or just finely chopping the chocolate. That way, the frozen chunks won't be so rock-hard to bite through.

Lightly grease an 8" round, springform pan, then spread the dough into an even layer on the bottom. Bake at 350 degrees for 20-25 minutes, until a toothpick inserted into the center comes out clean.

I basically had a giant, cake-sized cookie! It was soooo difficult to not pick up a spoon and start scooping up warm, gooey bites of chocolate chip cookie. A major test of self-restraint, folks. But, it's important to let it cool completelybefore topping...


While the cookie was cooling, it was the perfect time to churn some homemade ice cream! I whipped up a batch of my Hawaiian Sea Salt Caramel Ice Cream.

If you want to make things really easy on yourself, though, you can just use a pint of your favorite brand and flavor. Let it sit out at room temperature to soften a little bit.

Once the cookie has cooled, evenly spread the ice cream over the top.


The final layer is lightly sweetened, whipped cream. For extra flavor, add vanilla extract or vanilla beans! Cover the whole pan with foil or plastic wrap, then freeze for at least 1-2 hours to allow the ice cream and whipped cream to firm up.

Right before serving the cake, I again thought of Jacquelyn's love for chocolate. I was trying to figure out what to top the cake with. A generous drizzle of chocolate ganache finished it off beautifully! I could've poured on an entire layer or piped a more intricate design over the top, but we can't forget, this is for kids! The crazy, messy look of chocolate drizzled everywhere looks more fun!

To "unmold" the cake, run a thin knife around the edge to separate the cake from the sides. Then, simply unlatch  the springform pan. (The springform pan is key here.)


Looooooooooooooooooooooooooook!!!!

My very first attempt at an ice cream cake. :)

Triple-Layer Ice Cream Cake, with chocolate chip cookie, caramel ice cream, whipped cream, and chocolate drizzle...Say that to anyone and their mouth should water, not just the little ones! The different layers lookimpressive, but it isn't even half as difficult as making an actual three-layer cake. This is a simple solution for any birthday party, or any occasion when you need a cool, yummy dessert this Summer!

Happy Birthday, Jacquelyn!


Cookie & Ice Cream Cake (serves 8)

Print Recipe

Ingredients:
Cookie Layer:
8 tbsp (1/2 cup) Unsalted Butter, melted
1 cup Dark Brown Sugar
1 large Egg
2 tsps Pure Vanilla Extract
1 cup All Purpose Flour
1/2 tsp Baking Powder
1/8 tsp Baking Soda
1/8 tsp Fine Sea Salt
1/2 cup Mini Semi-sweet Chocolate Chips
Topping: 
1 cup Heavy Whipping Cream
3-4 tbsp White Granulated Sugar
1/2 tsp Pure Vanilla Extract
1 pint Ice Cream, softened (flavor of your choice; recommended: caramel or chocolate)
  1. Preheat oven to 350 degrees, and lightly grease an 8"-round springform pan.
  2. In a mixing bowl, whisk together the melted butter and brown sugar.  Add the egg, then beat until pale and slightly fluffy. Whisk in the vanilla.
  3. In a separate bowl, whisk together the flour, baking powder, baking soda, and salt. Fold the dry ingredient mixture into the wet ingredients, until everything is incorporated. Then, fold in the chocolate chips. Spread this dough into an even layer in the prepared pan. 
  4. Bake the cookie layer at 350 degrees for 20-25 minutes. A toothpick inserted into the middle should come out clean. Once the cookie is done, allow it to cool completely while in the pan.
  5. To make the whipped topping, whisk the heavy cream until it starts to thicken. Sprinkle in the sugar, then whisk until stiff peaks form. Add the vanilla. 
  6. Finally, spread the pint of ice cream into an even layer on top of the cooled cookie. Next, spread the whipped cream over the ice cream layer. Cover the entire pan with foil or plastic wrap, and freeze until the top layers are firm (at least 1-2 hours).
  7. To serve, run a thin paring knife around the edges of the cake to release it from the sides of the pan, then "unlatch" the springform pan.
  8. For garnish, drizzle chocolate ganache or sprinkle on chocolate chips. Enjoy!

Wednesday, August 7, 2013

Willow Brook Farms! Right in your Back Yard!


Willow Brook Farms!


Willow Brook Farms (the “Farm”) is located approximately 4 miles north of the Village of Millerton, New York just off of Route 22. 


The Farm was purchased by the Beneke family in 1943 and is currently being managed by Kenneth Beneke (3rd generation) and Henry Beneke (2nd generation). 


The Farm is comprised of approximately 425 owned acres and 500 rented acres.


The Farm is primarily a dairy farm with a herd consisting of 325 head (Registered Holsteins & Jerseys), of which 115 are milked. 


The Farm also breeds, raises and sells high profile Holsteins & Jerseys.


In addition, the Farm is currently raising beef cattle and pork, as well as producing sweet corn and various other produce. 


Their pork and beef is hormone and antibiotic free. The Farm Store at Willow Brook Farms (built from local trees by Kenneth’s best friend James Petkovich of JFP Construction) is open all summer Thursday through Sunday. Stop by for local ice cream and stock up on specialty food as well as Willow Brook Farms beef and pork selections. You can also visit them each Saturday at the Millerton Farmer’s Market, where they sell our pork, beef and sweet corn. 


The Farm also sells premium hay and has a custom bailing service. Feel free to contact them regarding their products and services.


Check out the Article in the Register Star!


196 Old Post Road #4, Millerton, New York
518.789.3289 or 518.789.6879 | wbfarmsny@yahoo.com